Alamofireで取得したデータをTableViewで表示する

2018年8月9日 Posted by PURGE

3年以上ぶりに、iOSの開発を行い始めた。今の時代はswift4 なのね。

■ 開発環境
OS : MacOS High Sierra Version 10.13.6
Xcode : Version 9.4.1

■ Server

サーバサイドは、JSONデータをRuby on Railsのように、DBスキーマから簡単に返すことができるので、Elixir言語で書かれた Phoexnix framework を利用しています。
その辺りは、後日に。

■ 取得データ
リクエスト送信先から返ってくるJSONデータは下記の感じ。

{
  "users" : [
    {
      "option" : "システムエンジニア",
      "age" : 46,
      "name" : "田島 啓之",
      "id" : 1
    },
    {
      "option" : "経理",
      "age" : 49,
      "name" : "都築 奏子",
      "id" : 2
    },
    {
      "option" : "ネットワークエンジニア",
      "age" : 45,
      "name" : "中村 栄人",
      "id" : 3
    },
    {
      "option" : "総務",
      "age" : 38,
      "name" : "千葉 博子",
      "id" : 4
    }
  ]
}

■ ソースコード解説

ListViewController.swiftのコードを説明する。

まずは、必要なライブラリをimportする。ここでは、AlamofireSwiftyJSONを利用する。

import UIKit
import Alamofire
import SwiftyJSON

次に、Swift4から、Codableというもので、構造体とJSONデータを簡単にマッピングできるようになったらしいので、Codableを利用して下記のような構造体を定義する。
これは、JSONデータのネスト構造を見てわかるように、Users構造体の中に、User構造体のリストが定義されている構造となる。

struct User : Codable{
    let id : Int
    let name: String
    let age : Int
    let option : String
}
struct Users : Codable{
    let users : [User]
}

ListViewControllerクラスは、UITableViewDelegateUITableViewDataSourceを採用する。特に問題はない。

class ListViewController: UIViewController, UITableViewDelegate, UITableViewDataSource {

各メソッドから参照可能なように、Users構造体を定義する。初期化時には値が決まらないため、nilを許すため、オプショナル型としている。

    var users : Users?

viewDidLoad()においてUIの初期化を行う。

    override func viewDidLoad() {
        super.viewDidLoad()
        
        let tableView : UITableView!
        tableView = UITableView(frame: view.frame, style: .grouped)
        tableView.delegate = self
        tableView.dataSource = self
        
        view.addSubview(tableView)

Alamofireの主要処理部分。まずは、対象サーバへリクエストを送信して、JSONで受け取る。レスポンスがnilの場合は、そのままreturn

レスポンスがnilでない場合は、JSONDecoderで、Users構造体へマッピングする。

tableView.reloadData()は、Alamofireで取得するデータは非同期のため、初回は、tableViewは空のため、読み込みが完了した時点で、tableViewをリロードする必要がある。

        //Alamofire
        Alamofire.request("http://localhost:4000/user")
            .responseJSON{res in
                guard let json = res.data else{
                    return
                }
                self.users = try! JSONDecoder().decode(Users.self, from: json)
                
            tableView.reloadData()
        }

ここでは、リストの数を返す必要がある。通信が非同期のため、この時点では構造体はnilなので、初回は0を返す必要がある。リロードされた時に、Users構造体にデータはセットされているので、users.count でデータ数が取得できる。

    func tableView(_ tableView: UITableView, numberOfRowsInSection section: Int) -> Int {
        if let cnt = self.users?.users.count{
            return cnt
        }
        return 0
    }

ここでは、セルのデータを設定している。やはりここも、初回はnilのため、let if で、nilチェックを行っている。
データがあれば、cell.textLabel.text を名前を設定する。

    func tableView(_ tableView: UITableView, cellForRowAt indexPath: IndexPath) -> UITableViewCell {
        let cell = UITableViewCell(style: .subtitle, reuseIdentifier: "CELL")
        if let user = self.users?.users[indexPath.row]{
            cell.textLabel?.text = user.name
        }
        return cell
    }

■ 最後に

ここに記したコードは、初回時のデータ取得から表示までのサンプル的な最低限のコードです。もう少しリファクタリングして、構造を設計する必要がありますが、とりあえず動作原理をシンプルに理解するために記載しました。

間違い等がございましたら、ご指摘願います。

下記、全ソースコードです。

ListViewController.swift

import UIKit
import Alamofire
import SwiftyJSON

struct User : Codable{
    let id : Int
    let name: String
    let age : Int
    let option : String
}
struct Users : Codable{
    let users : [User]
}

class ListViewController: UIViewController, UITableViewDelegate, UITableViewDataSource {
    
    var users : Users?
    
    override func viewDidLoad() {
        super.viewDidLoad()
        
        let tableView : UITableView!
        tableView = UITableView(frame: view.frame, style: .grouped)
        tableView.delegate = self
        tableView.dataSource = self
        
        view.addSubview(tableView)
        
        //Alamofire
        Alamofire.request("http://localhost:4000/user")
            .responseJSON{res in
                guard let json = res.data else{
                    return
                }
                self.users = try! JSONDecoder().decode(Users.self, from: json)
                
                //Debug
                print("--- User JSON ---")
                print(JSON(json))
                print("--- User Info ---")
                for user in self.users!.users{
                    print("NAME:" + user.name)
                    print("AGE:" + String(user.age))
                }
                
            tableView.reloadData()
        }
    }
    
    func tableView(_ tableView: UITableView, numberOfRowsInSection section: Int) -> Int {
        if let cnt = self.users?.users.count{
            return cnt
        }
        return 0
    }
    
    func tableView(_ tableView: UITableView, cellForRowAt indexPath: IndexPath) -> UITableViewCell {
        let cell = UITableViewCell(style: .subtitle, reuseIdentifier: "CELL")
        if let user = self.users?.users[indexPath.row]{
            cell.textLabel?.text = user.name
        }
        return cell
    }
    
    override func didReceiveMemoryWarning() {
        super.didReceiveMemoryWarning()
    }
    
}

Lovly Swift!!!
Swift4 ボタンとラベルのコード

2018年8月9日 Posted by PURGE

覚え書き。

    override func viewDidLoad() {
        super.viewDidLoad()
        // Label
        let countLbl = UILabel()
        countLbl.text = "ラベル"
        countLbl.textAlignment = .center
        countLbl.textColor = UIColor.blue
        countLbl.frame = CGRect(x: (self.view.frame.width-110)/2, y: 150, width: 110, height: 21)

        // Button
        let countUpBtn = UIButton()
        countUpBtn.frame = CGRect(x: (self.view.frame.width-100)/2, y: 200, width: 100, height: 30)
        countUpBtn.layer.borderWidth = 1.0
        countUpBtn.layer.borderColor = UIColor.blue.cgColor
        countUpBtn.layer.cornerRadius = 5.0
        countUpBtn.setTitleColor(UIColor.blue, for: .normal)
        countUpBtn.setTitle("ボタン", for: .normal)
        countUpBtn.addTarget(self, action: #selector(ViewController.countUp(_:)), for: UIControlEvents.touchUpInside)

        self.view.addSubview(countLbl)
        self.view.addSubview(countUpBtn)

    }

Xcode Alamofire で通信エラー

2018年8月4日 Posted by PURGE

下記のエラーが出た。

The resource could not be loaded because the App Transport Security policy requires the use of a secure connection.

まあこれは、有名なお話らしく、iOS9 以降のセキュリティポリシーで、http通信が原則禁じられているらしい。なので、Webviewのアプリでも生じるらしい。

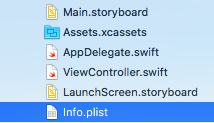
対応方法としては、Info.plist ファイルに「App Transport Securith Settings」を追加して、http通信を可能に設定するということ。

基本的には、開発時のみの設定としておくのが望ましい。

Alamofire インストール時のcocoapodエラー

2018年8月3日 Posted by PURGE

久しぶりに、swift で iOSの開発。
Podfile に以下を記述した。

source 'https://github.com/CocoaPods/Specs.git'
platform :ios, '11.0'
use_frameworks!

target 'MyProject' do
    pod 'Alamofire', '~> 4.7'
end

cocoaPod で Alamofireインストールしようとしてエラーが発生。

$ pod install
Analyzing dependencies
[!] CocoaPods could not find compatible versions for pod "Alamofire":
  In Podfile:
    Alamofire (~> 4.7)

None of your spec sources contain a spec satisfying the dependency: `Alamofire (~> 4.7)`.

You have either:
 * out-of-date source repos which you can update with `pod repo update` or with `pod install --repo-update`.
 * mistyped the name or version.
 * not added the source repo that hosts the Podspec to your Podfile.

Note: as of CocoaPods 1.0, `pod repo update` does not happen on `pod install` by default.

指示に従い pod repo update を実行して、pod install を再実行。

$ pod repo update
Updating spec repo `master`
Performing a deep fetch of the `master` specs repo to improve future performance

  $ /usr/bin/git -C /Users/xxx/.cocoapods/repos/master fetch origin
  --progress
  remote: Counting objects: 117, done.        
  remote: Compressing objects: 100% (111/111), done.        
  remote: Total 117 (delta 73), reused 0 (delta 0), pack-reused 0        
  Receiving objects: 100% (117/117), 12.89 KiB | 3.22 MiB/s, done.
  Resolving deltas: 100% (73/73), completed with 40 local objects.
  From https://github.com/CocoaPods/Specs
     1a871e6f9db..69b321bd0a4  master     -> origin/master
  $ /usr/bin/git -C /Users/xxx/.cocoapods/repos/master rev-parse
  --abbrev-ref HEAD
  master
  $ /usr/bin/git -C /Users/xxx/.cocoapods/repos/master reset --hard
  origin/master
  Checking out files: 100% (285048/285048), done.
  HEAD is now at 69b321bd0a4 [Add] ADMobGenSMA 0.1.1
warning: inexact rename detection was skipped due to too many files.

再度、インストール。

$ pod install
Analyzing dependencies
Downloading dependencies
Installing Alamofire (4.7.3)
Generating Pods project
Integrating client project

[!] Please close any current Xcode sessions and use `Sample.xcworkspace` for this project from now on.
Sending stats
Pod installation complete! There is 1 dependency from the Podfile and 1 total pod installed.

Elixir で md5 暗号化

2018年7月26日 Posted by PURGE

特に必要はなかったのだが、ちょっとお試しで書いてみた。
ちなみに、erlang20.0 で、crypto:md5/1 は廃止されているようなので、crypto:hash/2 を使用するようだ。

crypto:md5/1 will fail, since it was removed in 20.0; use crypto:hash/2

また、そのままだとバイナリで表示されるので、Base.encode16 で文字列化すること。

iex(1)> Crypto.convert_md5
<<254, 97, 249, 200, 73, 189, 91, 193, 23, 19, 37, 187, 163, 17, 159, 144>>
defmodule Crypto do
	def convert_md5 do
	  :crypto.hash(:md5, "Whoocus")
	#   :crypto.md5("Whoocus")
	    |> Base.encode16(case: :lower)
	end
end
iex(2)> Crypto.convert_md5
"fe61f9c849bd5bc1171325bba3119f90"

Phoenix でメールを送信する

2018年6月1日 Posted by PURGE

まずは、メール用のプロジェクトの依存ライブラリである Bumboo をインストールする。

■ mix.exs

  def application do
    [
      mod: {MyApp.Application, []},
      extra_applications: [:logger, :runtime_tools, :bamboo]
    ]
  end

  defp deps do
    [
      {:phoenix, "~> 1.3.2"},
      {:phoenix_pubsub, "~> 1.0"},
      {:phoenix_ecto, "~> 3.2"},
      {:mariaex, ">= 0.0.0"},
      {:phoenix_html, "~> 2.10"},
      {:phoenix_live_reload, "~> 1.0", only: :dev},
      {:gettext, "~> 0.11"},
      {:cowboy, "~> 1.0"},
      {:bamboo, "~> 0.7"},
      {:bamboo_smtp, "~> 1.2.1"}
    ]
  end

mix deps.get で追加した依存ライブラリをインストールする。

$ mix deps.get

プロジェクト設定ファイルに、メール設定情報を追記する。ここではSMTPサーバとしてGmailアカウントを使う。

■ config/config.exs

config :myapp, MyApp.Mailer,
       adapter: Bamboo.SMTPAdapter,
       server: "smtp.gmail.com",
       port: 587,
       username: "my@gmail.com",
       password: "password",
       tls: :if_available, # can be `:always` or `:never`
       ssl: false, # can be `true`
       retries: 1

メーラーモジュールを作成する。

■ lib/myapp/mailer.ex

defmodule MyApp.Mailer do
  use Bamboo.Mailer, otp_app: :myapp
end

メールモジュールを作成する。

■ lib/myapp/email.ex

defmodule MyApp.Email do
  use Bamboo.Phoenix, view: MyApp.EmailView

  def hello_email(email) do
    new_email
    |> to(email)
    |> from("my@gmail.com")
    |> subject("Welcome!")
    |> text_body("Welcome to My App!!")
  end
end

まずは、試しにコマンドラインからメールしてみる。

$ iex -S mix
Interactive Elixir (1.6.5) - press Ctrl+C to exit (type h() ENTER for help)
iex(1)> MyApp.Email.hello_email("tajima@whoocus.com") |> MyApp.Mailer.deliver_now
[debug] Sending email with Bamboo.SMTPAdapter:

%Bamboo.Email{assigns: %{}, bcc: [], cc: [], from: {nil, "my@gmail.com"}, headers: %{}, html_body: nil, private: %{}, subject: "Welcome!", text_body: "Welcome to My App!!", to: [nil: "tajima@whoocus.com"]}

%Bamboo.Email{
  assigns: %{},
  bcc: [],
  cc: [],
  from: {nil, "my@gmail.com"},
  headers: %{},
  html_body: nil,
  private: %{},
  subject: "Welcome!",
  text_body: "Welcome to My App!!",
  to: [nil: "tajima@whoocus.com"]
}

次に、Webアプリからメールを飛ばしてみる。コントローラを作成してルータに登録する。
ここでは、単純にページにアクセスしたら固定のメールが飛ぶ仕組み。

■ mail_controller.ex

defmodule MyApp.MailController do
  use MyApp, :controller

  alias MyApp.Mailer

  def index(conn, _params) do
    MyApp.Email.hello_email("tajima@whoocus.com") 
      |> Mailer.deliver_now
    render conn, "index.html"
  end
end

■ router.ex

    get "/mail", MailController, :index

このページにアクセスする都度にメールが飛ぶ。
ここでは、個人的な試作のためにGmailを使用しているので、SMTPサーバへのアクセスと送信はそこそこ遅い。
メールサーバを立てる方が実用的である。

Phoenix static file の追加

2018年5月30日 Posted by PURGE

uploads フォルダを、作成してブラウザから参照する場合。
priv/static/files を作成した場合の記述方法。

endpoint.ex

  plug Plug.Static,
       at: "/", from: :sample, gzip: false,
       only: ~w(css fonts images js uploads favicon.ico robots.txt) # 参照名を追記

  plug Plug.Static,
      at: "/uploads", from: "/files" # 参照名と、物理パス名を記述する。

Elixirの Enum.map と Enum.reduce の使いどころ

2018年5月22日 Posted by PURGE

Elixirの Enum.map と Enum.reduce の使いどころを簡単に頭へ入るように簡単な例を示してみる。

■ Enum.map

iex(1)> list = [1,2,3,4,5]
[1,2,3,4,5]

iex(2)> Enum.map(list, fn(x)-> IO.puts x end)
1
2
3
4
5
[:ok, :ok, :ok, :ok, :ok]

次に簡略化して記述してみる。

iex(3)> Enum.map(list, &(IO.puts &1)) 
1
2
3
4
5
[:ok, :ok, :ok, :ok, :ok]

同様の出力結果である。

list を頭に持ってきてみる。

iex(4)> list |> Enum.map(&(IO.puts &1)) 
1
2
3
4
5
[:ok, :ok, :ok, :ok, :ok]

同様の出力結果である。

Phoenix でsession を使用する

2018年5月22日 Posted by PURGE

■ PageController01 セッション設定

  def index(conn, _params) do
    conn = put_session(conn, :msg01, "Hello session 01!!")
    conn = put_session(conn, :msg02, "Hello session 02!!")

    render conn, "index.html"
  end

■ PageController02 セッション取得

  def index(conn, _params) do
    msg01 = get_session(conn, :msg01)
    msg02 = get_session(conn, :msg02)
    render(conn, "index.html", [msg01: msg01, msg02: msg02])
  end

■ index.html.eex セッション格納データ表示

<div>MSG01: <%= @msg01 %></div>
<div>MSG02: <%= @msg02 %></div>

Phoenix association belongs_to

2018年5月21日 Posted by PURGE

■ member.ex

defmodule Sample.Portal.Member do
  use Ecto.Schema
  import Ecto.Changeset


  schema "members" do
    field :birthday, :date
    field :email, :string
    field :first_name, :string
    field :last_name, :string
    field :passwd, :string
    field :gender_cd, :integer
    #    field :team_id, :id
    belongs_to :team, Sample.Portal.Team

    timestamps()

  end

  @doc false
  def changeset(member, attrs) do
    member
    |> cast(attrs, [:last_name, :first_name, :email, :passwd, :birthday, :team_id, :gender_cd])
    |> validate_required([:last_name, :first_name, :email, :passwd, :birthday, :team_id ])
  end
end

■ repo.ex

  def list_members do
    Repo.all(Member)
    |> Repo.preload(:team)
  end

  def get_member!(id), do: Repo.get!(Member, id) |> Repo.preload(:team)

■ index.html.eex

  <%= for member <- @members do %>
    <td><%= member.team.team_name %></td>
  <% end %>

■ show.html.eex

    <%= @member.team.team_name %>